Role: user
WEPPcloud Quick Start
This quick start walks a new WEPPcloud user through a standard first watershed run with the current (Un)Disturbed workflow. It covers:
- creating a new project
- uploading a soil burn severity (SBS) map
- delineating channels
- setting the outlet
- delineating subcatchments
- building landuse
- building soils
- building climate
- running WEPP
This guide intentionally stays on the main happy path. It does not cover Omni scenarios, treatment comparisons, calibration, or advanced WEPP options.
To follow along with this walkthrough, download the example SBS raster: Download Example 4 Class SBS Map (Rattlesnake Fire)
Before you begin
Have these ready before you start:
- a desktop or laptop browser
- the approximate watershed location
- an SBS raster in
.tifor.imgformat if you are modeling post-fire conditions
For a first run, it is usually best to leave advanced settings at their defaults unless you already know why you need to change them.
1. Create a new project
From the WEPPcloud landing page:
- choose the (Un)Disturbed interface for your region
- choose your unit system
- launch the interface
WEPPcloud creates a new run and opens the run page. That run page is where you will complete the rest of the workflow.
You can set a Project Name and Scenario in the page header if you want to label the run before you begin.
Tip: the run ID in the page header and URL is the unique identifier for your project. It is useful when you need to return to the run or report a problem.

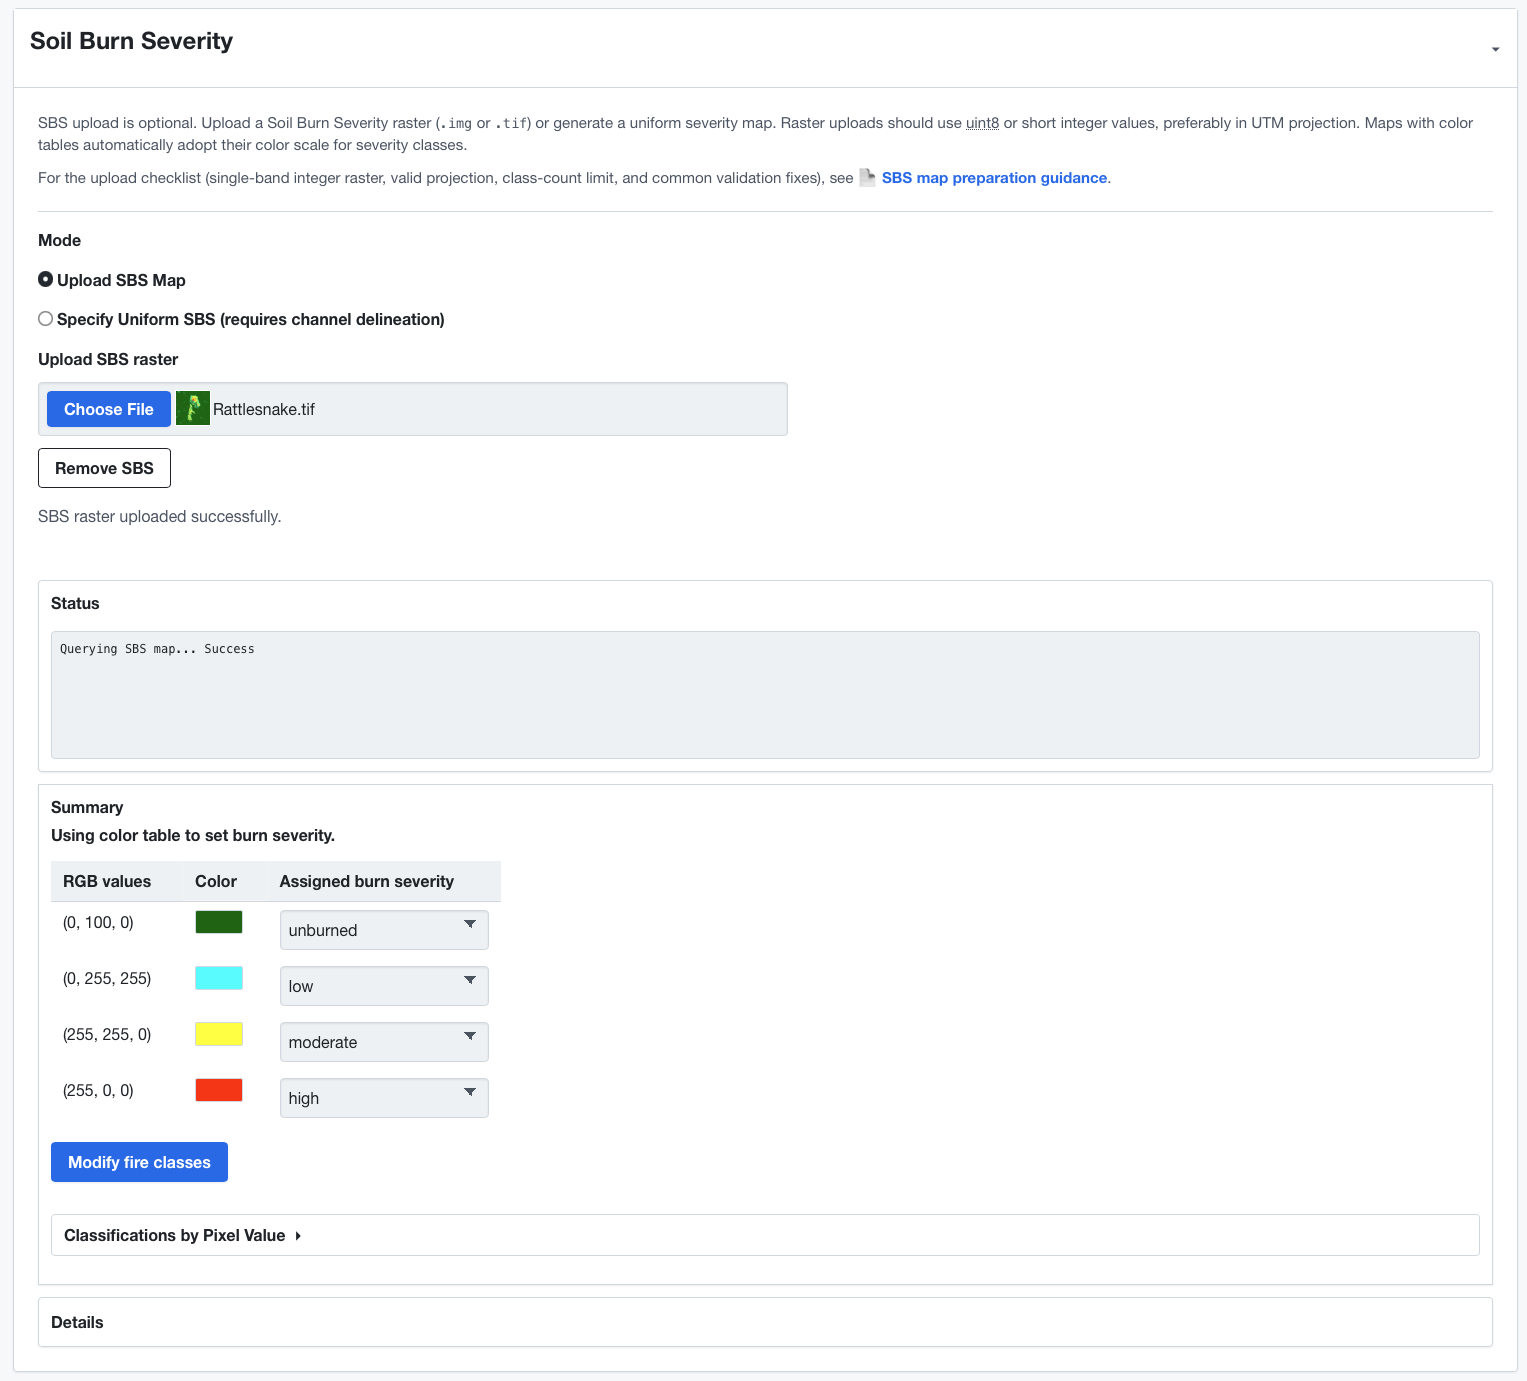
2. Upload the SBS map
Open Soil Burn Severity.
- leave Mode set to Upload SBS Map
- click the upload control for the SBS raster
- choose your
.tifor.imgburn severity raster - wait for the upload to finish before moving on
If the upload succeeds, WEPPcloud shows the current SBS file name in the control.
SBS upload note
Most users will upload the SBS raster directly through the browser control.
If the browser gets stuck in a system file picker, cancel the dialog and try again. If the problem persists, contact your WEPPcloud support contact rather than continuing with a half-finished upload.
SBS map notes
- SBS uploads should be georeferenced rasters
.tifand.imgare accepted- integer rasters are usually the safest choice
- rasters with a color table can often be interpreted automatically
If you do not have an SBS raster, the interface also offers Specify Uniform SBS, but for a real post-fire assessment an uploaded mapped SBS raster is usually the better choice.
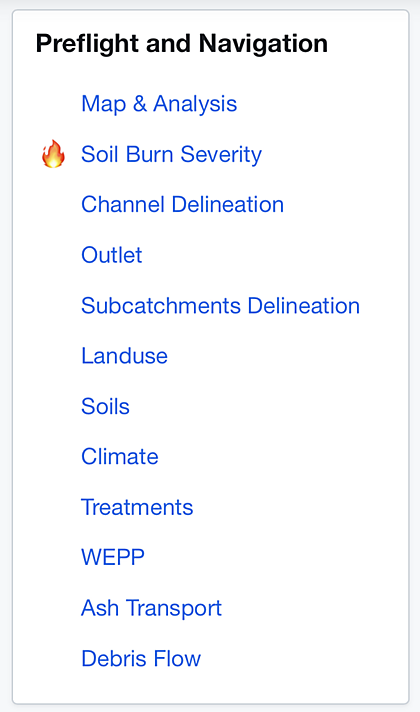
Preflight and Navigation
The Preflight and Navigation panel shows what WEPPcloud tasks have been completed and also serves as a table of contents for the workflow controls.
For this quick-start workflow, complete tasks from Soil Burn Severity Upload through WEPP in order. Going back and redoing a previous task invalidates later tasks, so you should rerun downstream steps after making earlier changes.
The symbols in the panel provide a preflight checklist of what has been completed.
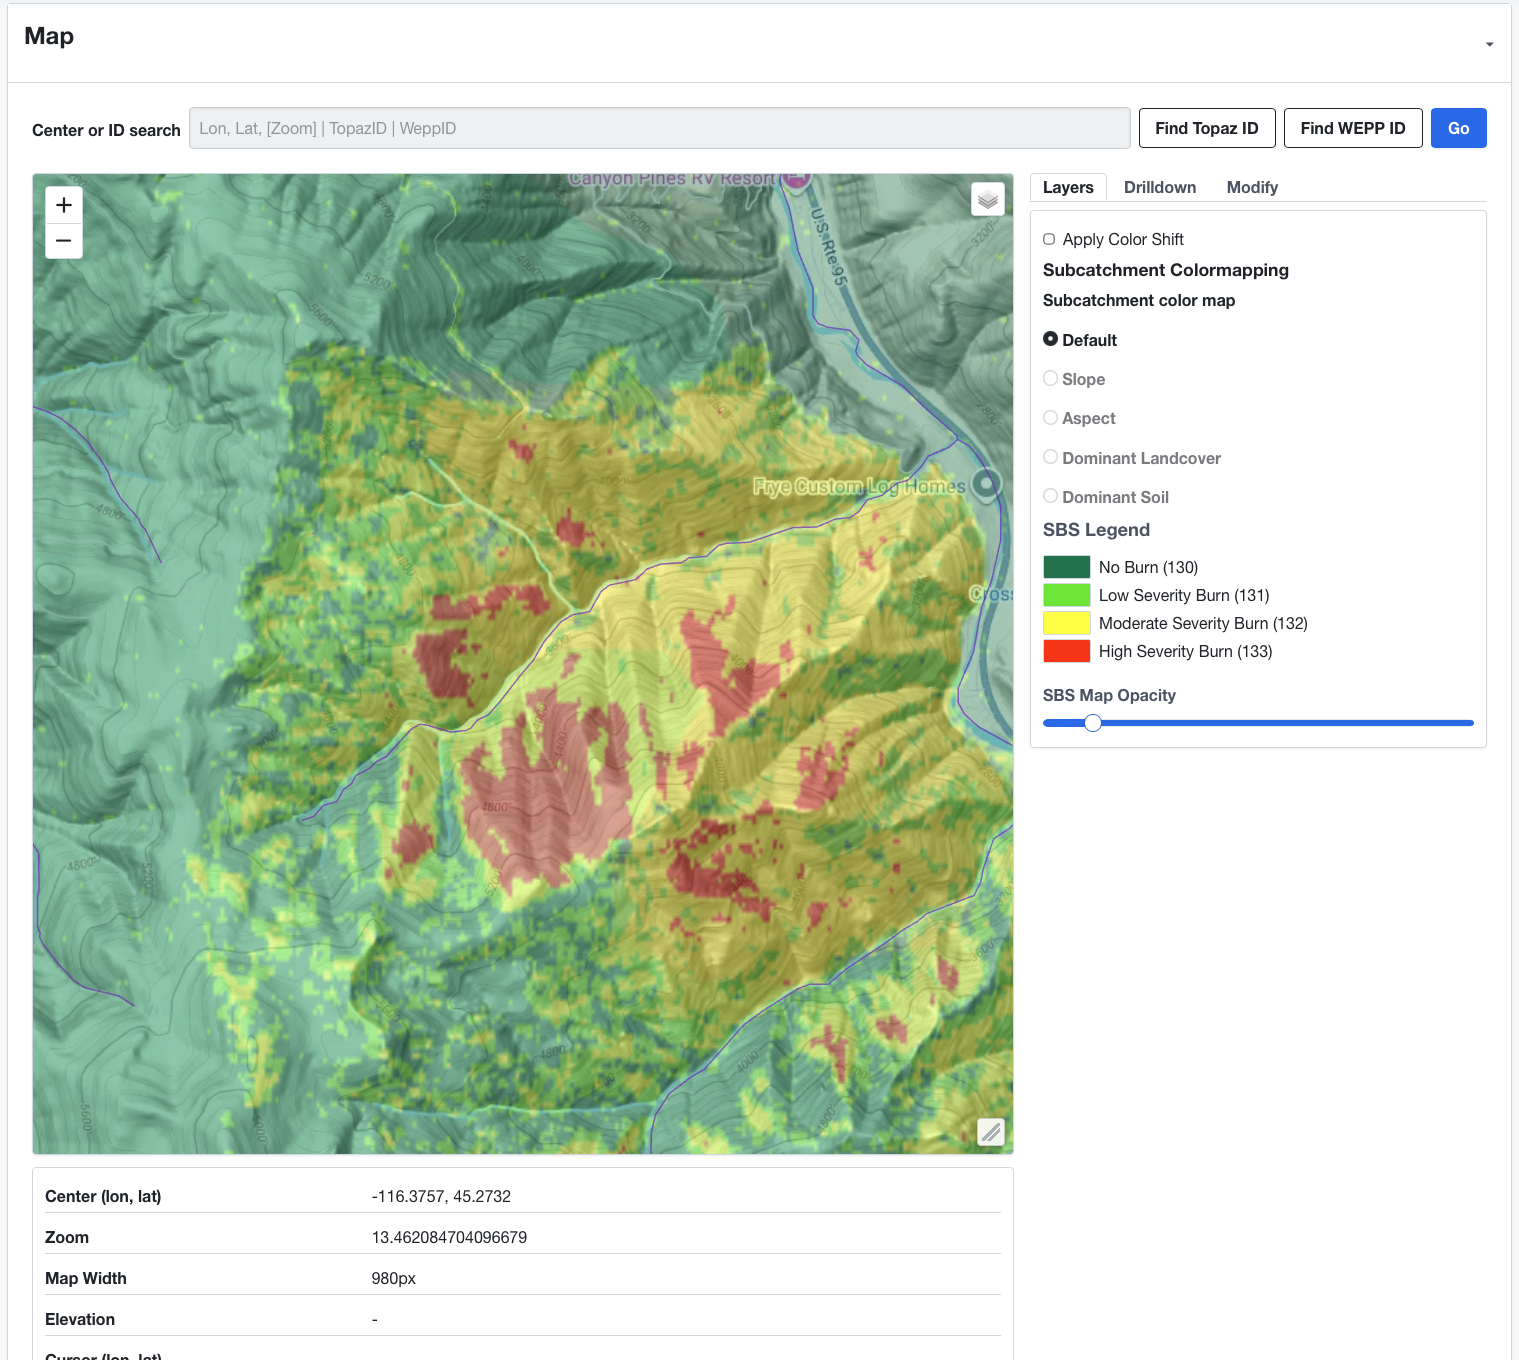
3. Find your watershed on the map
Use the map at the top of the run page to move to your watershed:
- pan by clicking and dragging the map
- zoom with the mouse wheel or trackpad
- keep zooming until the full watershed area is clearly visible
The default channel delineation workflow usually uses the current map extent, so what is visible on the map matters.
Important: make sure the watershed ridgeline is fully inside the visible map extent before you build channels or subcatchments. If the watershed extends beyond the map boundary, delineation can fail or produce the wrong watershed.
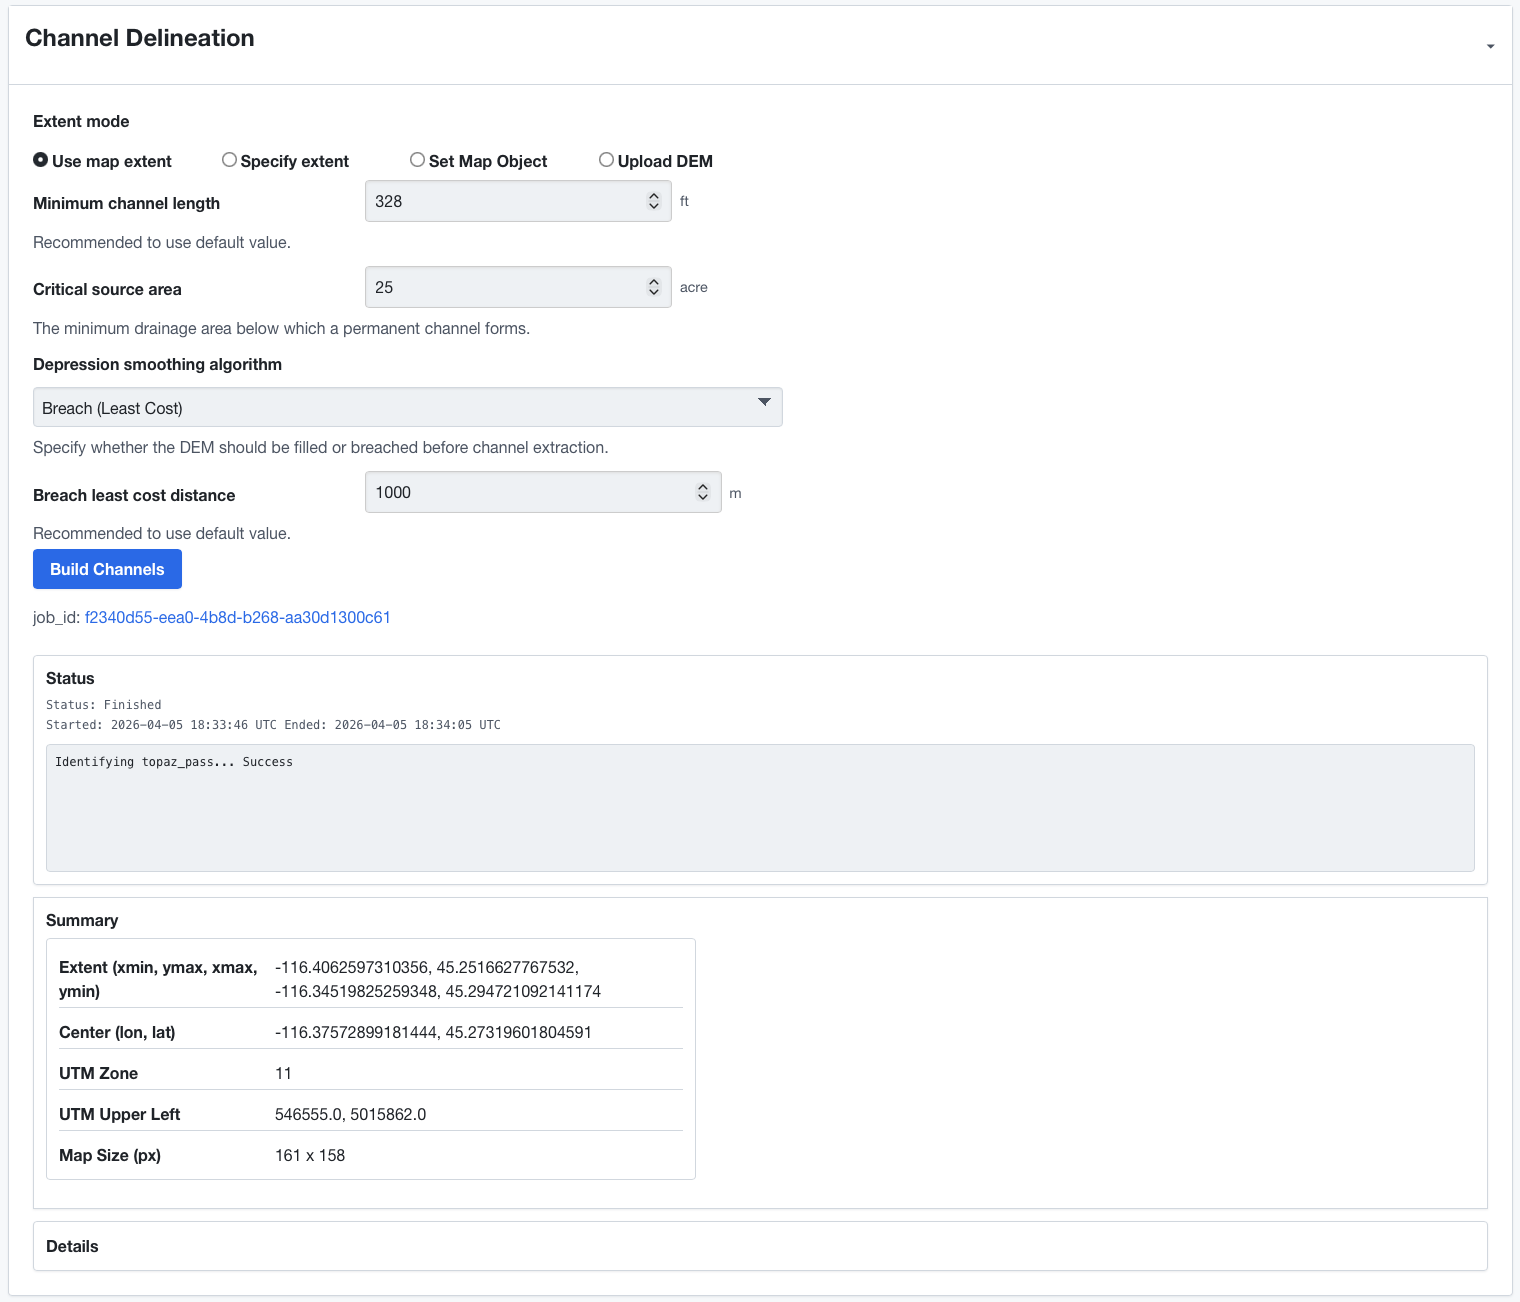
4. Build channels
Open Channel Delineation.
For a normal first run:
- leave Extent mode as Use map extent
- keep the default Minimum channel length
- keep the default Critical source area
- if your interface uses the WBT backend, leave the default depression smoothing setting unless you have a reason to change it
- click Build Channels
WEPPcloud will acquire elevation data for the current extent and extract the channel network.
Channel delineation tips
- if the Build Channels button is disabled, zoom in farther
- lower channel length or source area settings usually create a denser network
- for most first runs, the defaults are the right place to start
- if your watershed touches the map boundary, stop and reset the map extent before continuing
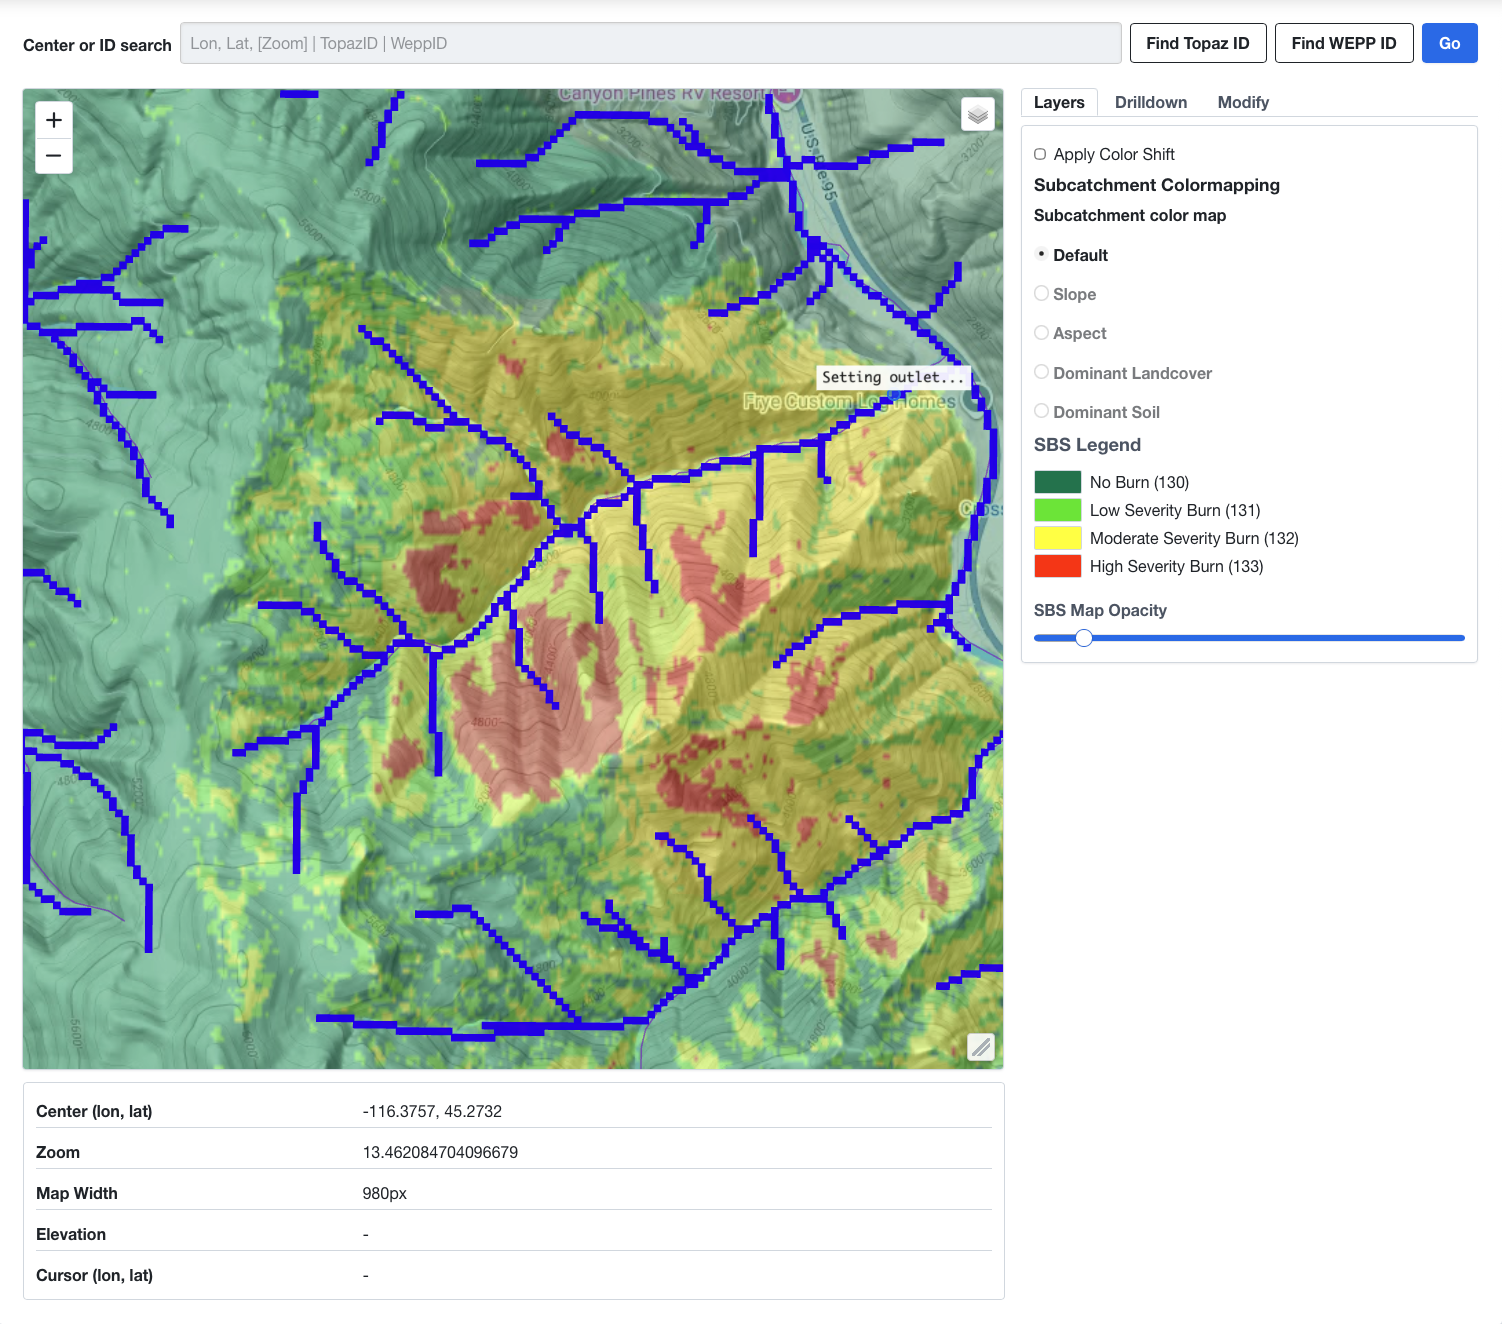
5. Set the outlet
Open Outlet.
Click Use Cursor and set the outlet location as shown in the figure below.
WEPPcloud snaps the selection to the drainage network and stores the outlet location.
Why use longitude and latitude?
The cursor tool is available, but the longitude/latitude option is usually easier for a first walkthrough because it avoids map-click precision problems and is easier to reproduce in documentation.
Outlet tips
- set the outlet only after channels have been built
- make sure the coordinates are near the downstream end of the mapped drainage network
- if the result looks wrong, update the coordinates and apply the outlet again

6. Build subcatchments
Open Subcatchments Delineation.
- leave advanced options alone for a first run
- click Build Subcatchments
This step delineates the watershed draining to your outlet and divides it into subcatchments and hillslopes for WEPP.
If subcatchments fail
A common failure is that the watershed extends outside the map extent used during channel delineation. If that happens:
- go back to the map
- zoom out or reposition so the full watershed fits inside the extent
- rebuild Channels
- set the Outlet again
- rerun Build Subcatchments

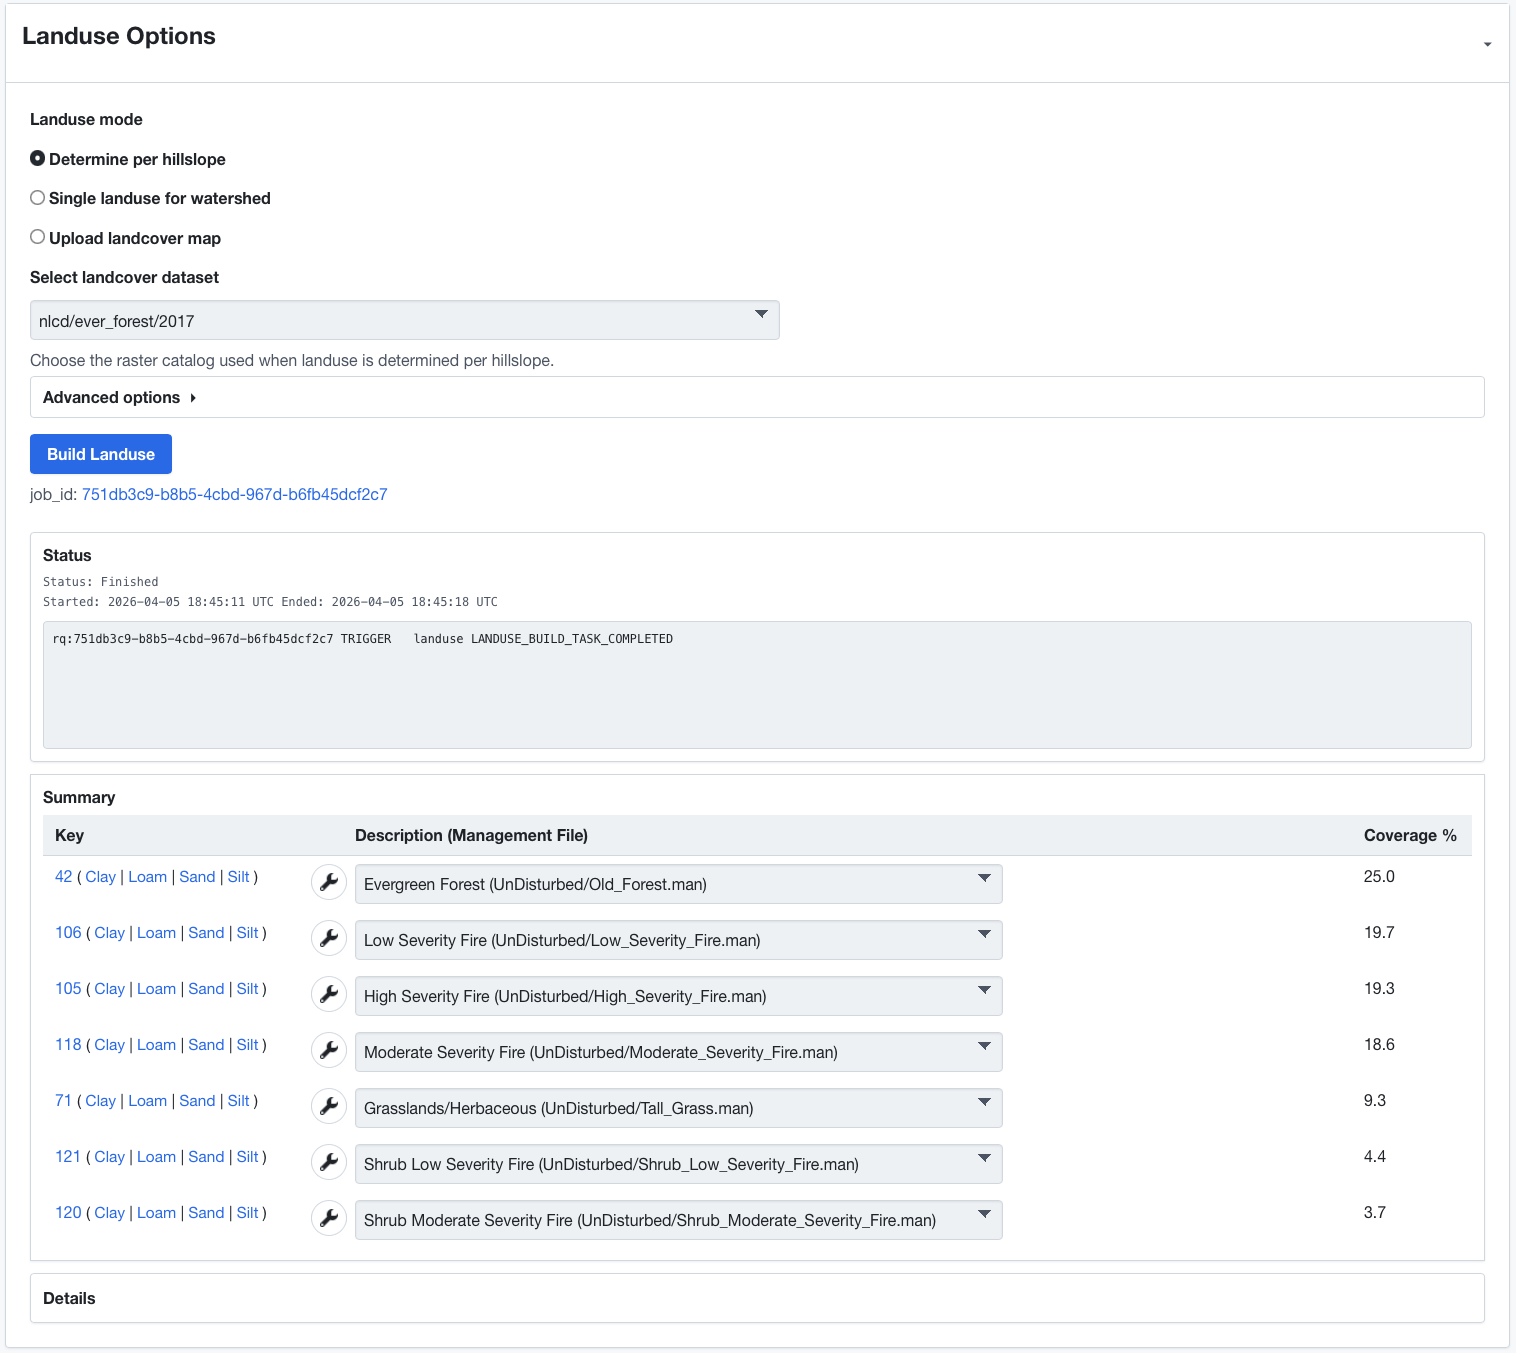
7. Build landuse
Open Landuse Options.
For a standard first run:
- leave Landuse mode on Determine per hillslope
- select
nlcd/ever_forest/2017for the landcover dataset. - click Build Landuse
WEPPcloud assigns landuse or management classes to each hillslope using the selected landcover dataset.
Landuse notes
- Determine per hillslope is the usual starting point
- Select the
ever_forestlayer when you want WEPPcloud to model landuse as forest anywhere that has ever historically been forested - Select
2017because it is the year before the fire in this walkthrough, which keeps the landcover input on a pre-fire baseline - Single landuse for watershed is only for cases where you intentionally want one management everywhere
- Upload landcover map is an advanced workflow and usually not needed for onboarding
If you are using a disturbed run, WEPPcloud can also apply burn-related landuse effects based on the SBS map.
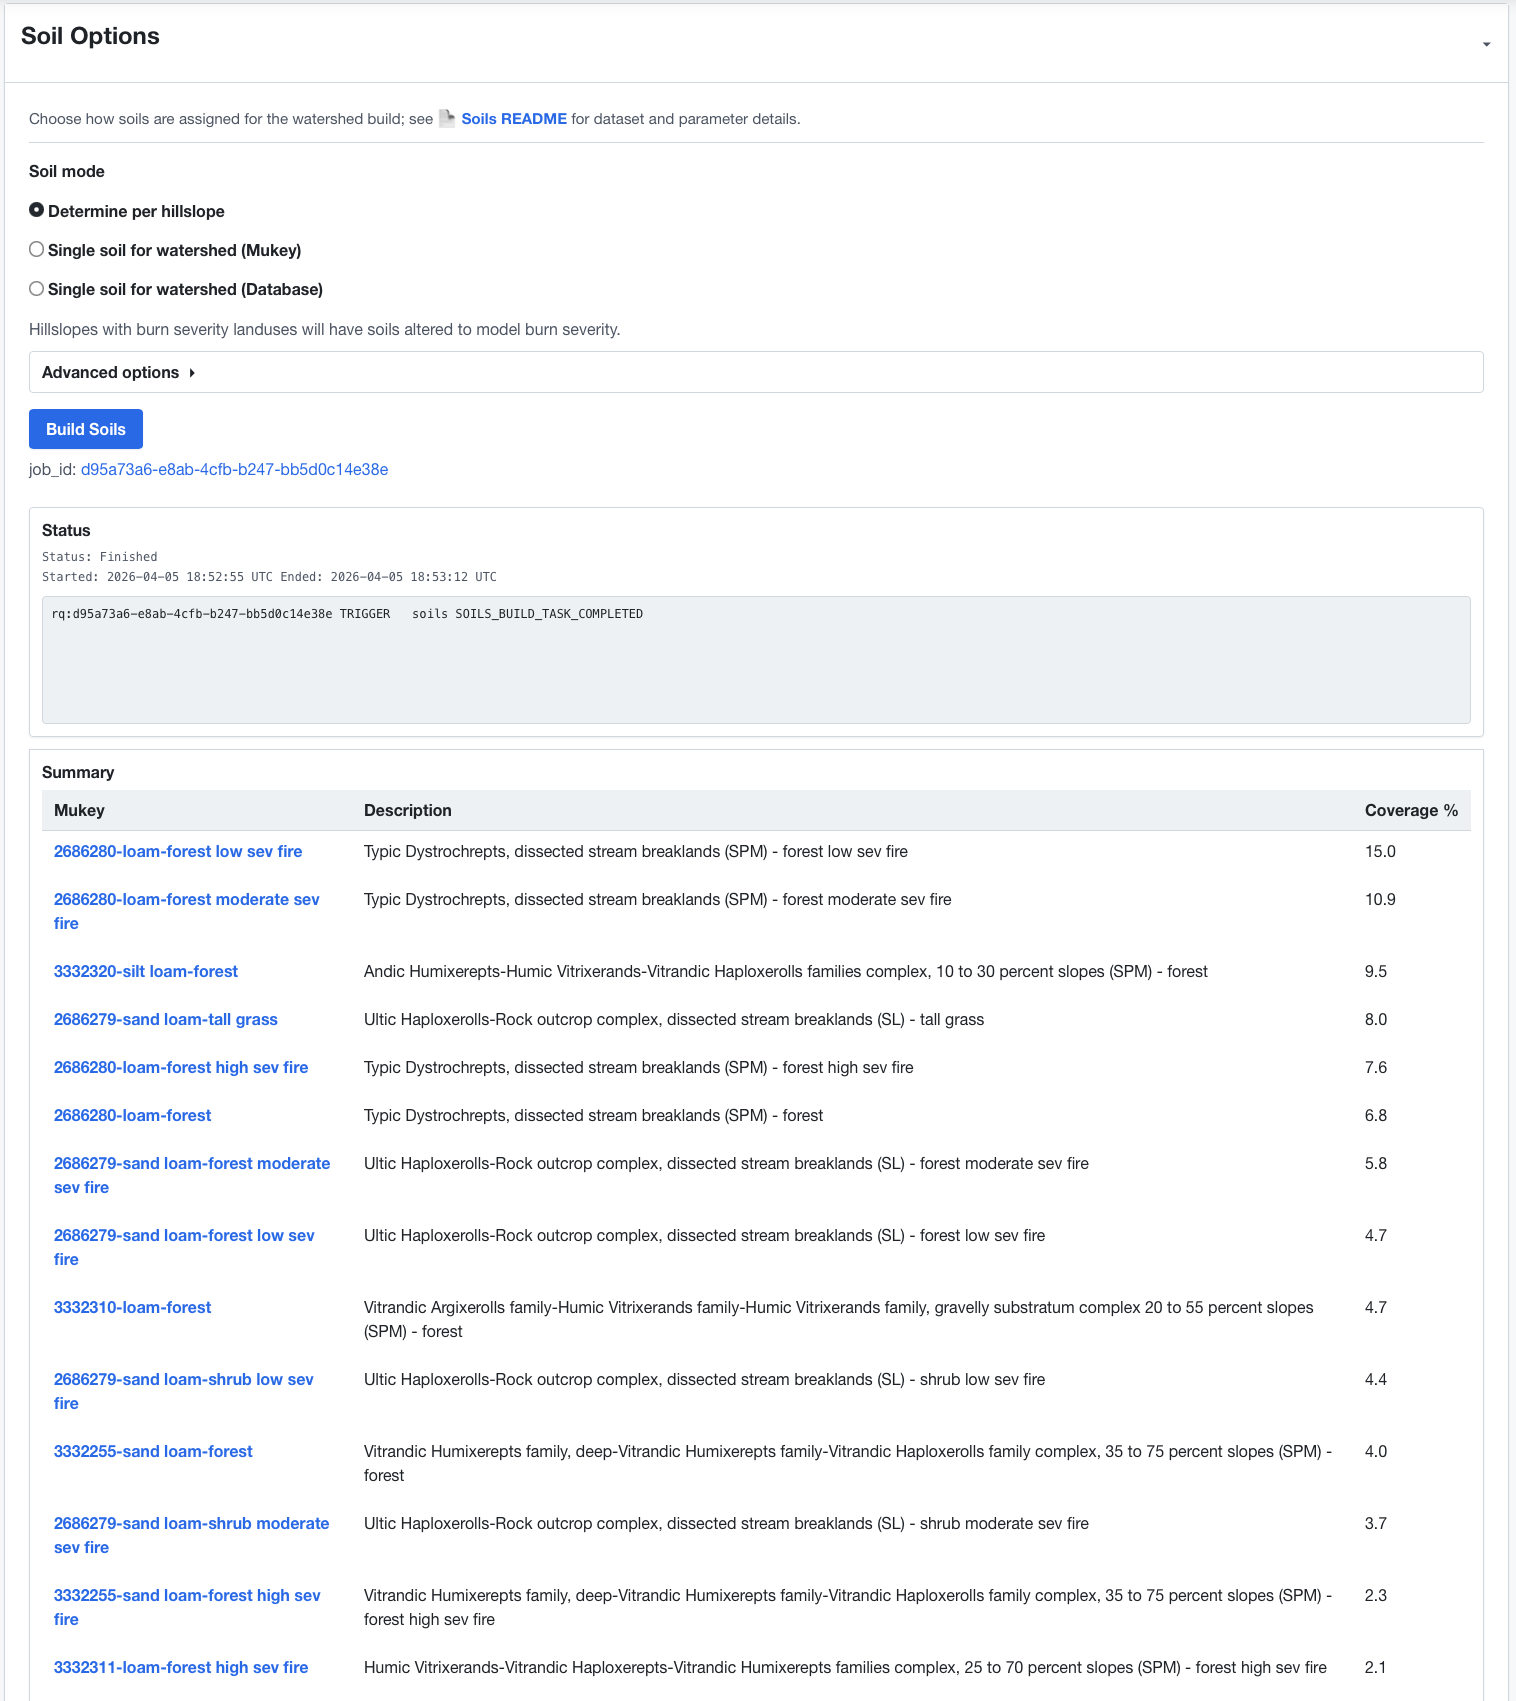
8. Build soils
Open Soil Options.
For a standard first run:
- leave Soil mode on Determine per hillslope
- leave advanced settings at their defaults
- click Build Soils
WEPPcloud will query the configured soil sources and assign soils to the delineated hillslopes.
Soil notes
- in disturbed workflows, hillslopes affected by burn severity can have soils adjusted for post-fire modeling
- the disturbed soil version selector is an advanced option; if you are new to the system, keep the default unless your project team has a preferred convention
- Single soil for watershed is mainly for special or controlled cases, not general onboarding
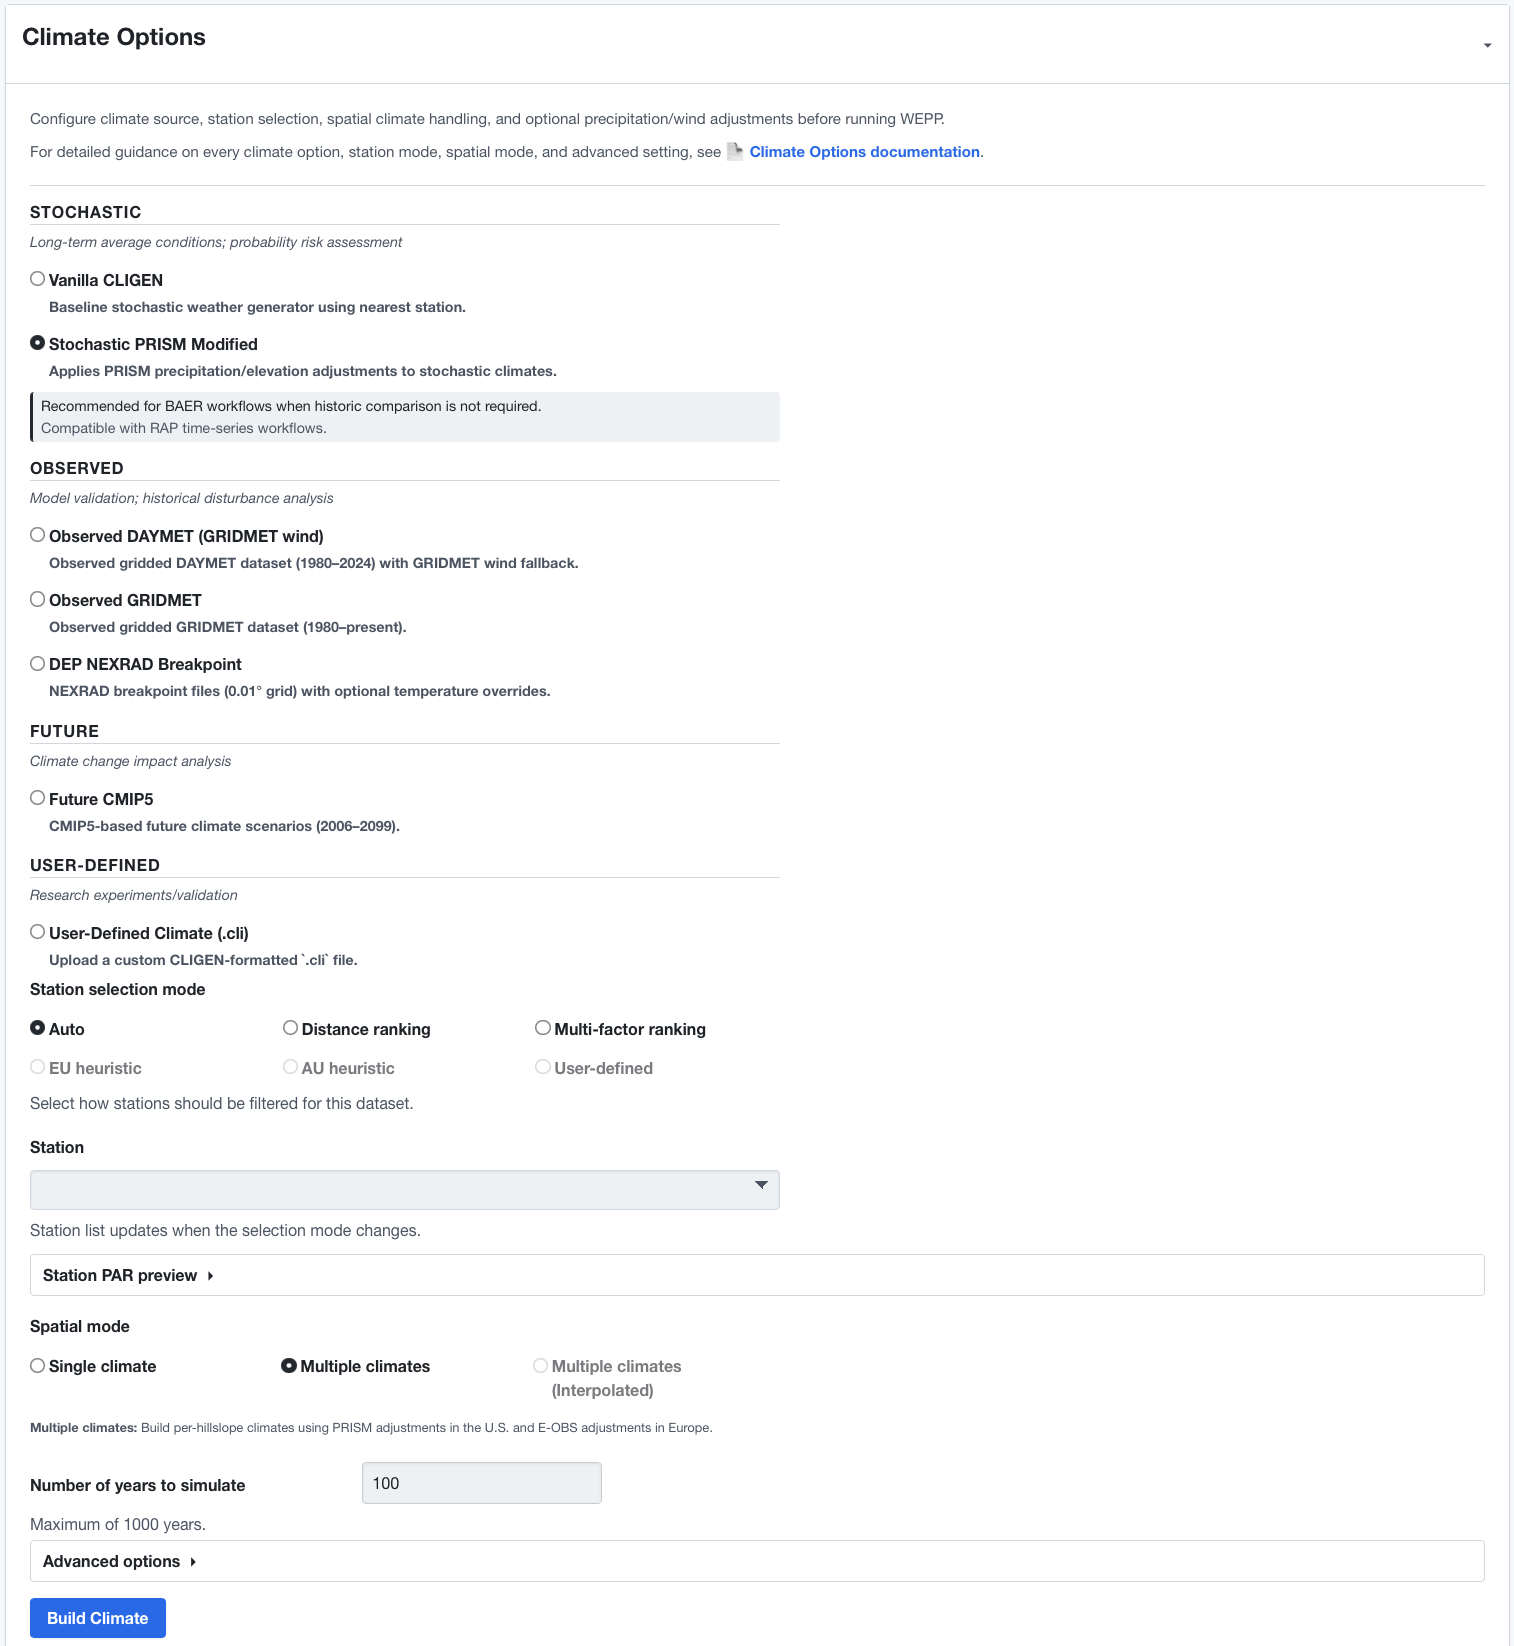
9. Build climate
Open Climate Options.
For a standard first run:
- choose a climate dataset appropriate for your work.
- for a simple onboarding run, use the default recommended dataset already selected by the interface
- leave Station selection mode on Auto or use Multi-factor ranking if you want to inspect station choices manually
- leave Spatial mode at the default unless you specifically need per-hillslope climate variation
- set the simulation years or observed date range if needed for your dataset
- click Build Climate
WEPPcloud will identify a station or climate source, generate the needed climate inputs, and save them into the run.
Climate notes
- Stochastic datasets generate simulated weather sequences
- Observed datasets use observed historical climate records when available
- for a first run, avoid advanced precipitation scaling and other advanced options unless you already know why you need them
- the station list updates when you change station-selection mode
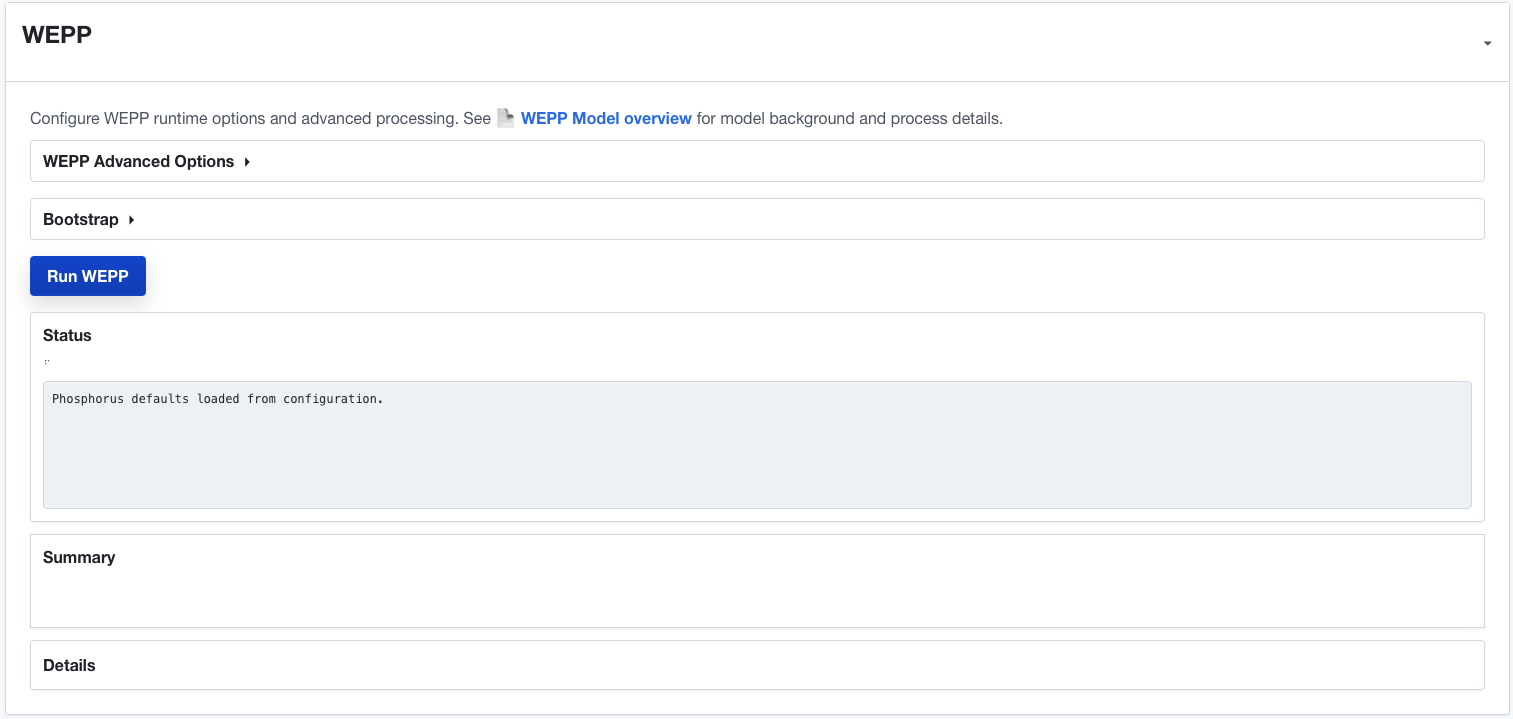
10. Run WEPP
Open WEPP.
For this quick start:
- leave WEPP Advanced Options collapsed
- leave Bootstrap alone
- click Run WEPP
WEPPcloud will prepare the required inputs and run the hillslope and watershed workflows for the project.
What to expect
- small watersheds may finish quickly
- larger watersheds can take much longer
- status messages appear in the WEPP control while the run is processing
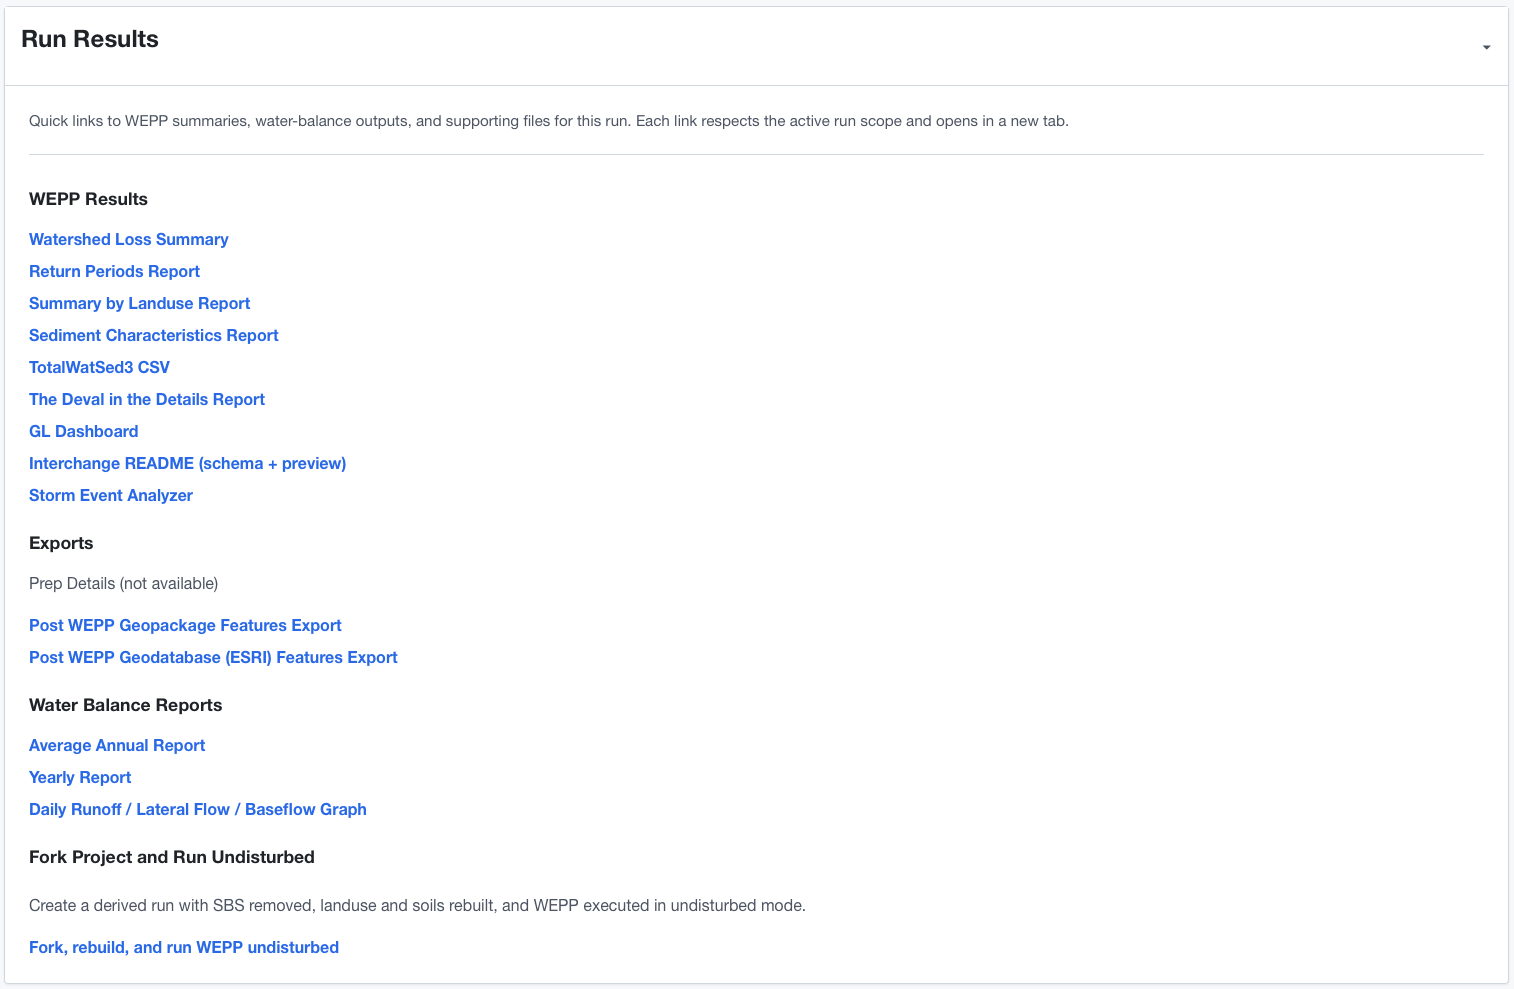
When the run completes, result panels and map layers become available.
Recommended first-run workflow summary
If you just want the short version, the sequence is:
- create project
- zoom to watershed
- upload SBS map
- Build Channels
- set the Outlet using Longitude, Latitude
- Build Subcatchments
- Build Landuse
- Build Soils
- Build Climate
- Run WEPP
That order matters. In particular:
- build channels before setting the outlet
- set the outlet before building subcatchments
- build subcatchments before landuse, soils, and climate
- complete landuse, soils, and climate before running WEPP
Common onboarding mistakes
The watershed touches the map boundary
If the watershed is clipped by the current map extent, subcatchment delineation may fail. Expand the map extent, rebuild channels, set the outlet again, and rerun subcatchments.
The outlet is placed away from the stream network
If the outlet coordinates are too far from the extracted channel network, the delineation result may be wrong or may fail. Re-enter coordinates closer to the watershed outlet.
Too many settings changed at once
For onboarding, use defaults first. Once you have a successful run, make one change at a time.
Trying to use advanced modes too early
Get a clean baseline run working first. After that, branch into advanced options, alternate datasets, or scenario comparisons.